Advice on how to prepare for a master bathroom renovation. These were our steps (and some tips) to plan our reno before the work began.
This is the long, drawn out saga of our master bathroom renovation. We did plan so well that the renovation itself went quite smoothly. This, however, was not our first bathroom renovation. We had learned a lot from prior renovations.
Master Bathroom Renovation – The Prep | Remodel Tips
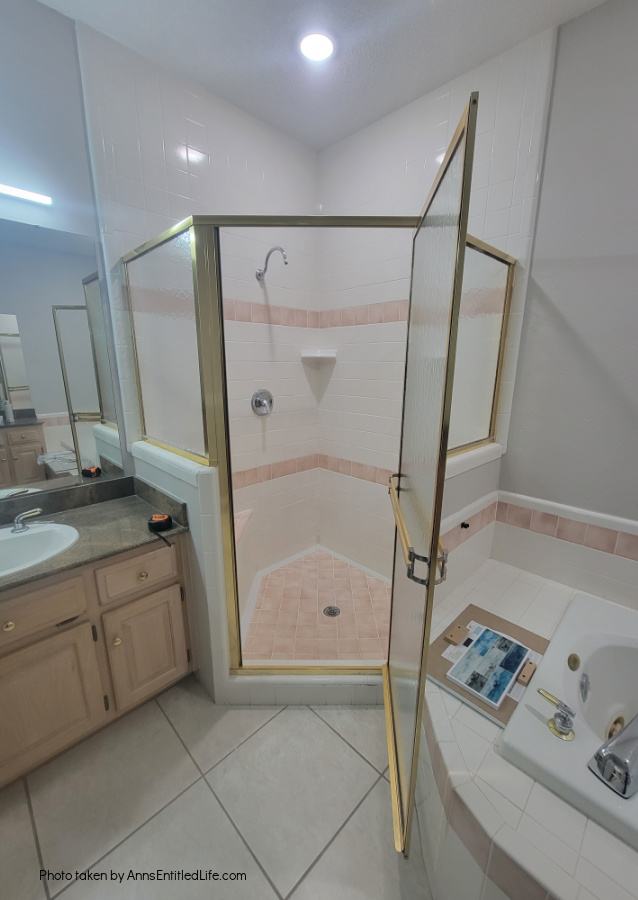
When we bought this house a few years ago, I knew after one shower I wanted the master bath redone. It was ugly, functionally obsolete, the jet tub was useless to us, and I could not see in my mirror to do hair or make-up when Hubby was in the bathroom doing his routine as the lights were across from one another and bounced making me basically light-blinded.
The shower was ridiculously small and nothing like our old master bath shower.
I figured we would be redoing the master bath within a year. In the end, it started at closer to two years, but Hubby can be stubborn.
Hubby was not interested in renovating. Instead, he took me on a few trips. Until one day we noticed drain flies in the bathroom. We read online how to kill them (hot water and vinegar) and our pest control company also sprayed. Hubby did a LARGE caulk job at the edges of the shower hoping to fill any gaps or holes in the grout where they might be laying eggs. All to no avail. It was gross having to check out the shower before getting in for drain flies, and finally one day I presented my list of contractors to Hubby. He had a choice: find a contractor, or I will.
Now if you knew my husband, he has one home repair trait: he’s a perfectionist. He wants everything done perfectly, or he will do it himself. He then endlessly obsesses over whatever perceived imperfections his job might have. In my opinion, my husband does great work, but he is his own biggest critic.
After going down a long road with several contractors (and even one that gave us a few potential designs), Hubby decided to GC the job himself. This would be his fifth bathroom renovation (we owned rentals in the past).
In Florida, it is very difficult to hire skilled labor. Let’s face it, a tile person, electrician, dry waller, etc. would rather work for a home builder than a homeowner. Not only are builders not as fussy as someone who is living in the house, it is steady, constant work; less aggravation with a constant paycheck.
Hubby got his first quote from a tile guy and then got a few more tile quotes. In the end, that first guy won the job (and we have since hired him for other bathroom jobs). Hubby also hired electricians and plumbers because we wanted permits pulled.
He interviewed framers, painters, and popcorn ceiling removers, and then decided to do those jobs himself.
Hubby never seriously considered hiring out for demolition and had always planned on doing that part himself. The dumpster was a phone call and it arrived the next day.
Since we had no load bearing walls coming down or going up, Hubby was able to demo and frame himself. The kid (he’s over 18 LOL) across the street helped him with this and I was very grateful to him for helping us out.
Since we designed this ourselves, we took a long, long time to consider what we wanted from this master bath.
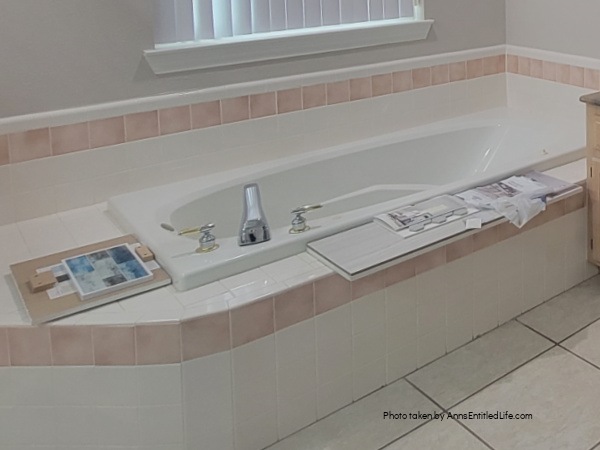
I was not opposed to a tub if we could squeeze it in, but in the 17 years we owned our old house the English soaking tub we had was never used once. And tubs do take up a lot of room. There is a tub in this house in the other full bath, so no issues at resale unless the buyer really wants a tub in the master bath.
This bathroom is also square, so there was a lot of wasted space. We took months to decide how we would want it laid out, but did not tape out the final floor plan until demo was complete. Instead of a cad drawing, Hubby used excel to map out our layout. We had five different choices, and some including tubs. We chose what worked best for our needs, and the end result of this renovation came very close to that drawing.
Why didn’t we use an architect? Well, we really wanted to. However, we could not find one willing to take on this small job. We were guided to one woman who has an opening for us months in the future (and she never did follow-up), and at that point we just decided to do it ourselves.
We had thought about making this bathroom ADA compliant (we aren’t getting any younger) but that would have required making the doorway larger, making the water closet doorway larger, and digging into the slab to recess the shower floor to make it curbless. I was sad to let that idea go, but it really was not feasible at this time in this house.
The shower got laid out to be about the size we thought it might be. We were constrained by the window, wanted to keep the drains were they were if possible, and Hubby wanted to use a Schluter shower system.
Our old home’s master shower had eight shower sprays. We used one shower head all the time and two shower heads a few times a year. The other six shower heads sat there until they leaked and had to be repaired. We knew we did not want more than two shower heads on in this shower.
We also wanted medicine chests. For some reason, medicine chests are not common in Florida. When we were house hunting we must have looked at 50 homes and very few had a medicine chest, and those that did had teeny-tiny ones. This bathroom had a very small one, and I found it inadequate. Medicine chests were high on my priority list.
In the end, we decided a tub was a waste of space and we would rather have a longer vanity and larger shower. As I said, we did have some constraints which included the window – we have a brick house and matching that brick would be very difficult. That meant the window was staying in place (it was a new hurricane window). Also, we like a water closet and saw no reason to move that around. And, we wanted to keep the drains in place if possible (it was).
Along about this time the woman at the tile store also showed us photos of her recent bathroom renovation and I feel in love with her “linen cabinet.”
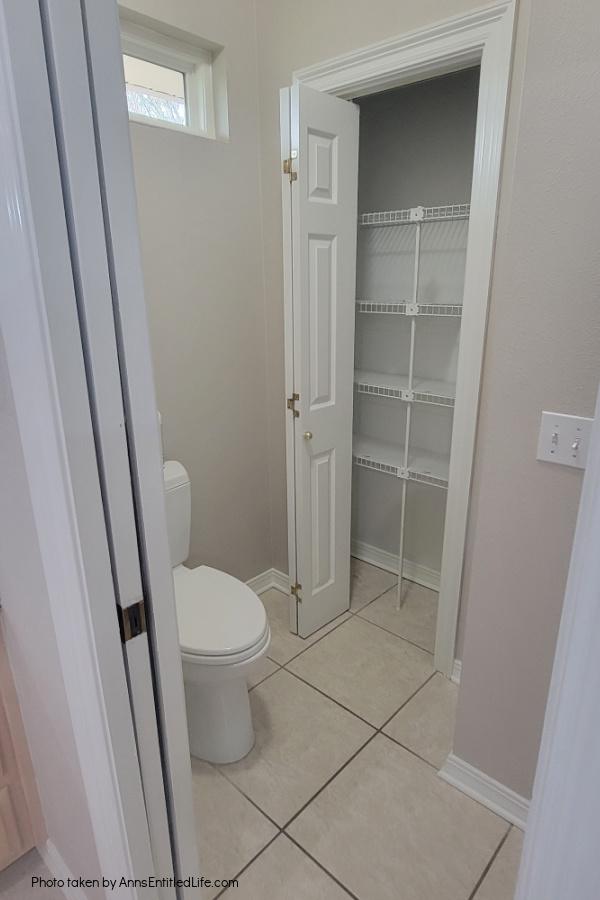
We had two closets in the master bathroom – a small one in the water closet area, and an even smaller one in the main area of the bathroom. That linen cabinet idea she showed me blew me away. Once Hubby demoed, we were able to see just how large a cabinet we could fit in the space (very large) and so took off to several cabinet manufacturers to see if it was doable (it was).
One of the things we had to decide was where to put the shower controls. It was suggested that they go on the pony wall so we would only have to put our hand into the shower to turn it on. That way, we would not step into the shower to turn on the controls. Nothing is more “fun” than being sprayed with cold water when turning on shower controls.
We discussed it, thought about it, and decided against it. There would be electricity going through that pony wall because I wanted electric towel warmers. I did not like the idea of having both water and electric running through that half wall, and with a choice of water and easy reach on the shower controls versus electricity and towel warmers, the towel warmers won easily.
This was the only possibly regret we might have had, but the shower door made it a non-issue (and a non regret). The shower door swings in and out, so we swing it in, turn on the shower with the door for “protection” against cold water and leave to let the water warm up for 30 seconds.
But, I am getting ahead of myself.
Before Hubby could build the pony wall we had to map out the entire bathroom. We needed to be sure the shower ended before the window and that there was enough room between the vanity and the shower to comfortably walk. We also wanted to be certain the shower seat was big enough to actually use.
Hubby decided he wanted a niche for his toiletries. I decided I did not need one. I knew I would use the top of the pony wall as a shelf for my toiletries. This was made possible by a wide ledge + shower door placement.
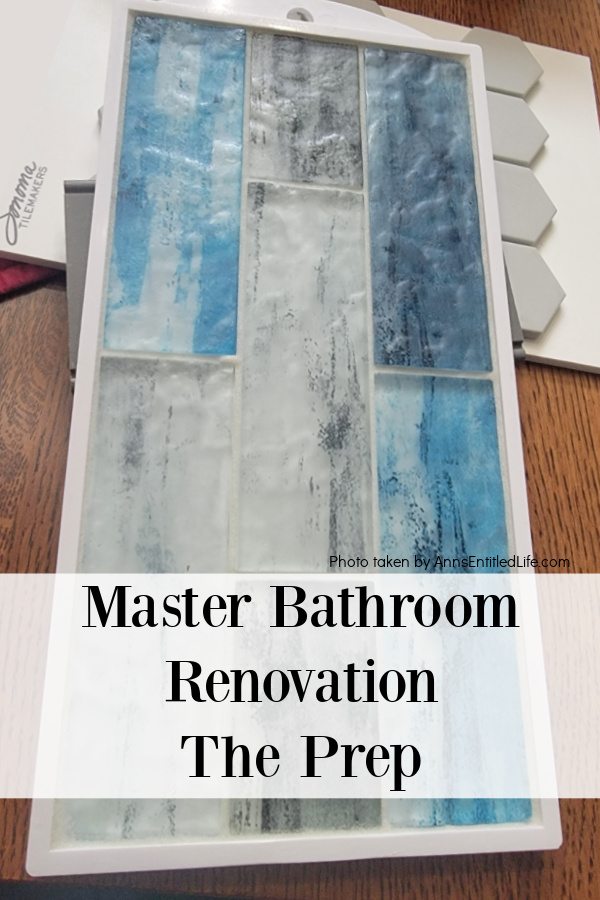
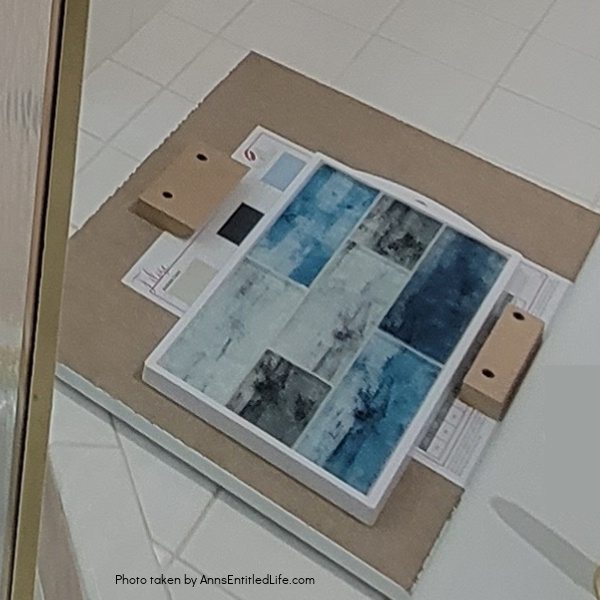
Everything we did in this bathroom from the bathroom tiles to the floor tiles to the paint colors and cabinetry and vanity colors was done to match this glass tile. Hubby found it at one of the tile stores, we both loved it, and the entire bathroom colors were chosen to match it.
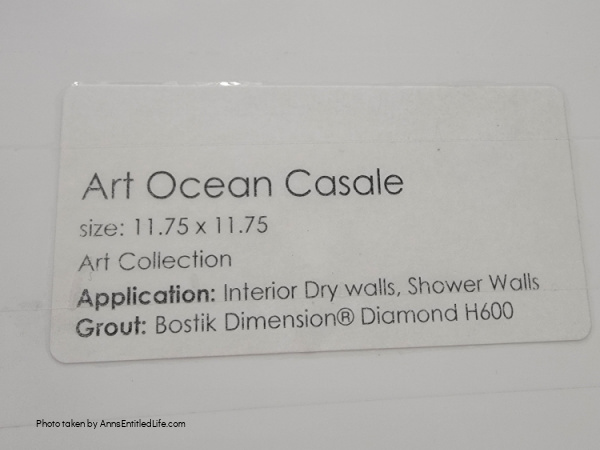
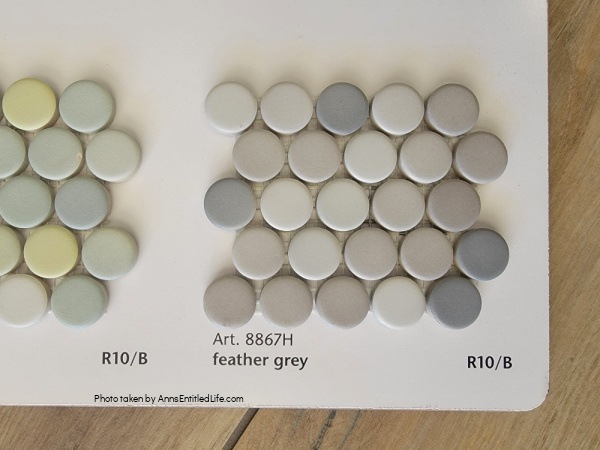
We had the tiles for floor and bathroom shower brought in and set them inside the bathroom with our lighting. It was amazing how much it changed from being out in the sun. I set paint squares behind the pile to see what looked best not only for the walls, but for the cabinetry. We had a custom paint job and seal on the cabinets, and knew we had to match everything else so it would look cohesive. This was, by far, the most difficult part of the planning. Tying together bathroom tile, accent glass, floor tile, wall color, and cabinetry color plus finishes sounds easy, but it is much more difficult than anticipated. I wanted a clean, bright look in a room with one small window. We also decided on sharp angles for everything, instead of rounds or curves. The only softening came from our bathroom lighting which did end up being round – everything else is a rectangle.
We also had two can lights to start with. We decided to keep them, retrofit the ones that were there to match four new ones. In total, we ended up with six can lights (the electricians ran the electric) in the ceiling as well as the globe lights over the medicine chest. That really helped brighten the place up!
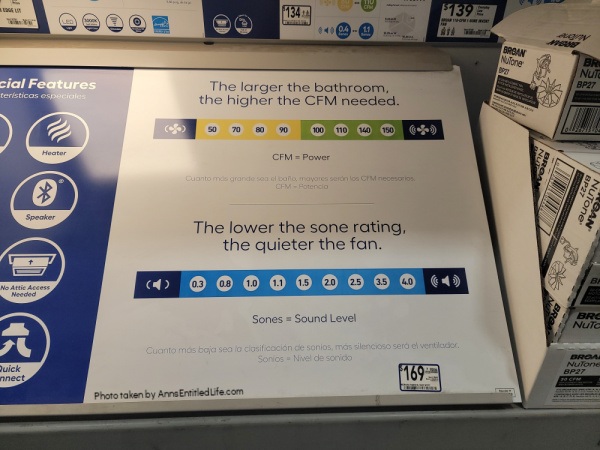
Our fans in the bathroom before demo sounded like an airplane taking off. I wanted a quieter fan and maybe we went too quiet as I have to now double check when I turn them on that I actually did turn them on — they are that quiet!
Because we did not put in a tub, we had an entire wall to put in our vanity. The old vanities in this bathroom had a terrible design flaw – they were across from one another. That meant light bounced off the mirrors and it was very difficult to see into those mirrors to do hair or make-up. The vanities we were replacing were also very short in height. We thought the people who owned the home prior to us (the original home owners and designers) might have been short, but nope, that was a design choice!
When we decided to put in our vanity the length of the wall, we also decided to have them a kitchen depth. A bathroom vanity depth is generally 21″, kitchen depth is 24″. Since we had the room, we decided kitchen depth it is! That meant more storage and with no basement, storage is always at a premium in Florida. You’d think that 3″ wasn’t a big difference, but it is. We also had to decide on spacing for the sinks which impacted plumbing and the medicine chest placement.
We decided on two medicine chests, 36″ wide each, centered over the sinks. They take up about half of space above the vanity area, so we did an even break with lining them up. This had to be done before the cabinet guys measured for the vanity and the plumbers did their work (the plumbers were in several times, so this came after the first time). We wanted the sinks centered based on the medicine chest positions.
The medicine chests are not only large, they light up, show the time, temperature, and are backlit. There is also an electric plug inside. Too bad they aren’t self-cleaning.
The medicine chests have really come in handy for keeping our junk organized and off the counter. I am a crazy person for putting things away and Hubby is … not. These are so large and have so much room inside that he is now very good about using them and keeping his things neat and orderly.
The faucets we got were actually our first purchase for this bathroom renovation. Hubby found a deal. They are Delta, brass fitting, etc. and were being clearanced for $99 each. We figured if we hated them we would use one in the spare bathroom and put the other away for something else. Luckily, we have really liked them. They have the proper clearance we needed (shallow due to how low the medicine chests are) and they look good, too.
The shower is far enough away from the sink faucets that it did not have to matchy-match. In the shower we went with a thermostatic valve, a hand wand, and a shower head. Hubby was able to put a filter on our shower head, too. We both dislike rain showers so that was not even a consideration.
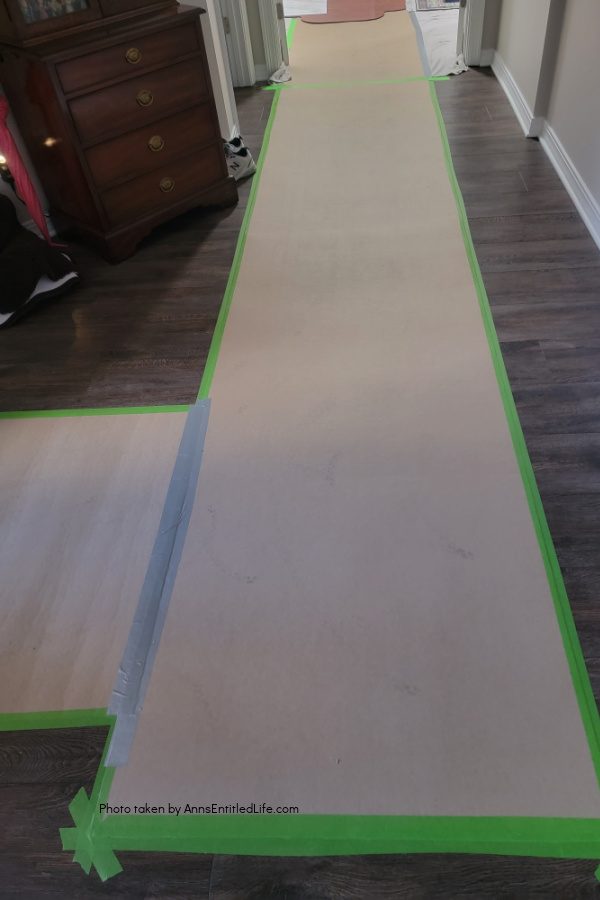
Hubby protected our floors from the walking that would be done from the master bathroom through to the front door. He laid down ram board and then taped it down. It lasted the entire length of the project between us and contractors walking on it.
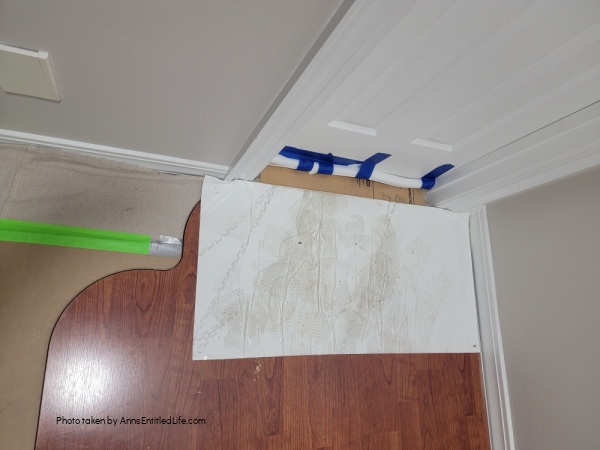
Since that foyer leads to our carpeted bedroom, he put down a few more measures including sticky mats. In or out, stepping on the sticky mat removed debris from the bottom of work boots and shoes. During demolition it helped keep the dust and debris in the bathroom. During the tile lay down, it helped prevent random pieces of dirt from being embedded in the mortar.
At this point, planning was pretty much finished and we were on to demolition.
● For more renovations on Ann’s Entitled Life, click here.
● If you enjoyed this post, be sure to sign up for the Ann’s Entitled Life weekly newsletter, and never miss another article!
Paula Short says
Oooo. I just loved your planning tour Anne. How grande.
Thanks bunches for sharing with Sweet Tea & Friends this month dear friend.