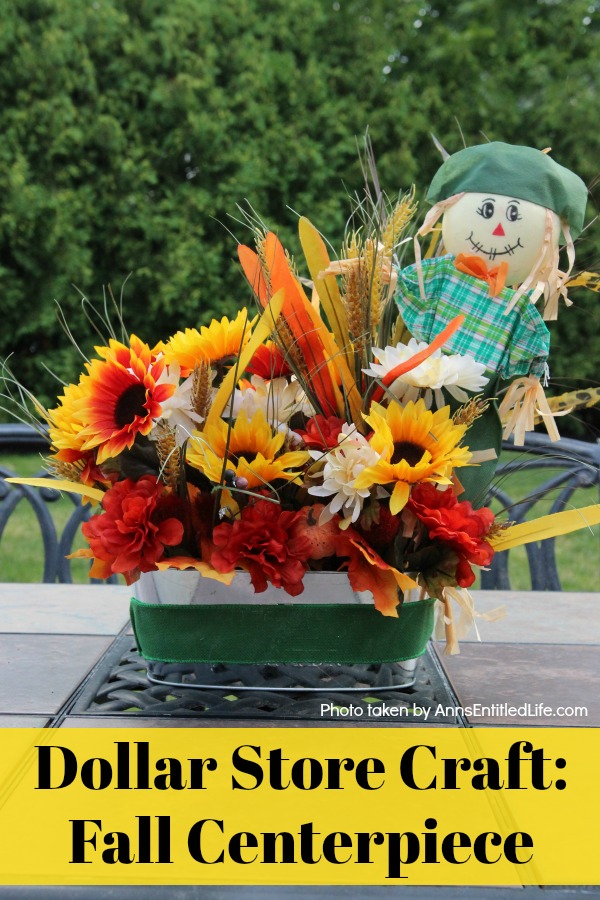
This is a fun, easy-to-make fall craft you can make with basics found at your local dollar store. If you are looking for an inexpensive yet beautiful craft, you can make this fall centerpiece in about 45 minutes with these step-by-step instructions.
This DIY Dollar Tree Fall centerpiece may look complicated, but it is really pretty simple to make. Floral arrangements can be expensive. Buying at the dollar store can help keep seasonal decor costs down.
Dollar Store Craft: Fall Centerpiece
When my niece suggested we make a few Dollar Tree crafts, I must admit I was not very enthusiastic. When I think “dollar store items,” I generally think er, craptastic and overpriced (check out those per ounce prices!) Sure, I buy a few Dollar Tree items at my local Dollar Tree – most notably the garden stones for crafts and the clear stone weights for crafts. Those are a real bargain, in my opinion. But, as for the rest? That is Hubby’s wheelhouse, not mine
The tin container used in this Dollar Tree craft was rather flimsy. It was, however, only a dollar. The floral foam was also a dollar, and THAT is a bargain!! (I’m adding something else to my “buy at a dollar store list.”) If your Dollar Tree does not carry floral foam in a pinch, you could buy a large styrofoam ball or two and cut it to fit your base. Make sure you use a little hot glue to secure your flowers into the styrofoam base if you go this route.
The flowers are more cheaply made than what you would find over at Michaels, Hobby Lobby, or Joann but they are also about 1/5th the price of those at a craft store. Still, keep in mind that the quality of flowers from a dollar store can be suspect. Look them over carefully when you are purchasing. It also does not hurt to mix and match your crafts supplies from the dollar store and a craft store. For instance, I said the tin container from this craft is flimsy – well, it may be a good idea to upgrade the base as the extra cost .of a sturdy base is a good investment. As the base goes, so goes your craft! And, no one says all your craft supplies must come from the same store!
This fall centerpiece would make a terrific rustic wedding centerpiece, Thanksgiving holiday season, or an Autumn table centerpiece. Dollar store wedding centerpieces are very common as you can save a lot of money versus fresh flowers. The best part is you can reuse this centerpiece at your dinner table after the wedding. Dollar Tree centerpieces can be a real money saver when the budget (wedding budget, holiday budget) is tight and you do not have a ton of money to spend.
This really is a beautiful centerpiece that can be paired with candlestick holders, or as its own decoration, on your dining room table. Since it can double as a holiday decoration for Thanksgiving, you might want to consider it for an end table decor in your living room, too. There are many different ways to use this centerpiece – I am sure you have even more creative ideas than what I have listed!
A few tips and variations for making a dollar store floral arrangement:
● When selecting faux flowers, bushier flowers will be better for filling in “holes.”
● When choosing silk flowers, stay in the same theme (fall flowers, spring flowers, wedding flowers, Christmas season, etc.) and do not be overly “matchy.” The key to a nice arrangement is height differential.
● Wispy tall grasses will make the arrangement look more realistic.
● Cut stems longer than you think you will need (stand it next to the “pot” and see how it lines up). You can always cut more off, but you cannot add back length (well, beyond the length of a pick).
● Do not work on one side at a time; try and work the whole arrangement. It will help with balance. This is a three-dimensional arrangement, so be conscious of the space. Turn and work to fill in the foam in the tin.
● Taller flowers are inserted in the center, and then the other flowers are filled in around.
● Tall wisps are inserted last (first on a wreath, last on a flower arrangement).
Dollar Tree Supplies:
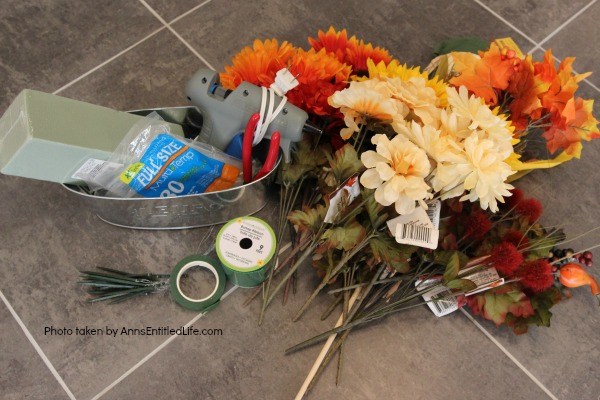
● Dollar Store Flowers (your choice of color)
● Tin
● Floral Foam
● Small Scarecrow
● Wire Edged Ribbon
Please note that even though this is a dollar store craft, you will need a few items that can not be purchased at a dollar store (or at least not at any dollar stores where I have shopped!):
● Floral Picks
● Wire Cutters
● Hot Glue Gun
● Hot Glue Sticks
● Floral Tape
Dollar Store Craft: Fall Centerpiece Directions:
● Wrap a piece of wire-edged ribbon around the tin (for length), plus at least ½ an inch. Cut.
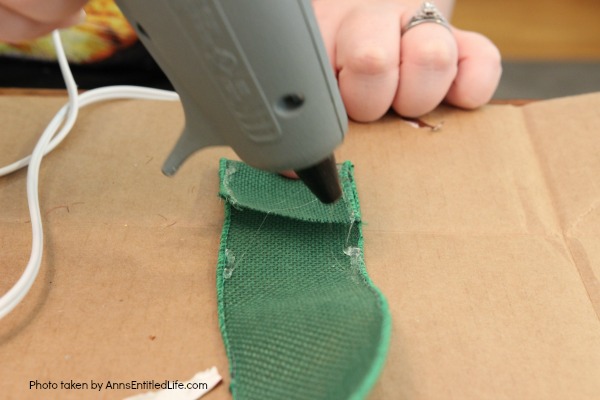
● Lay the length of ribbon out good side down and fold over that excess ½”. Hot glue it in place (see above). This will help prevent fraying.
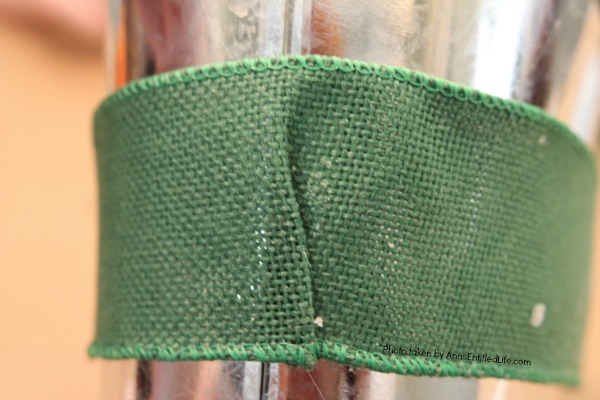
● Hot glue the ribbon to the outside of the tin.
● You may have to form darts at the ends so that the ribbon will lay flat.
● Hold the scarecrow against the tin. Eyeball how tall you would like it to be in your arrangement. The scarecrow should be the tallest thing in this craft, so plan accordingly.
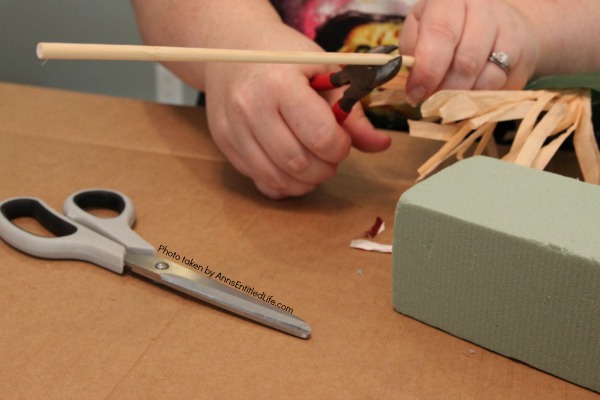
● Cut the wooden stem to the length you would like your scarecrow.
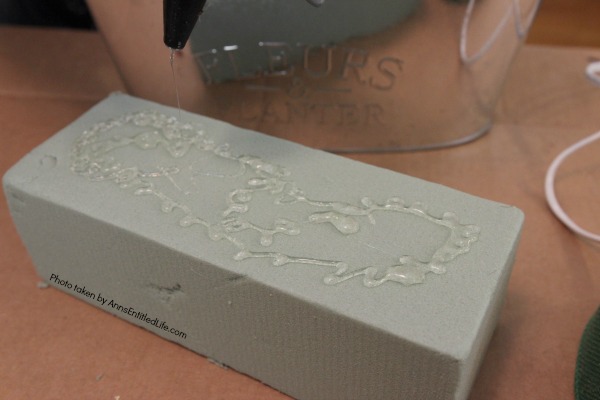
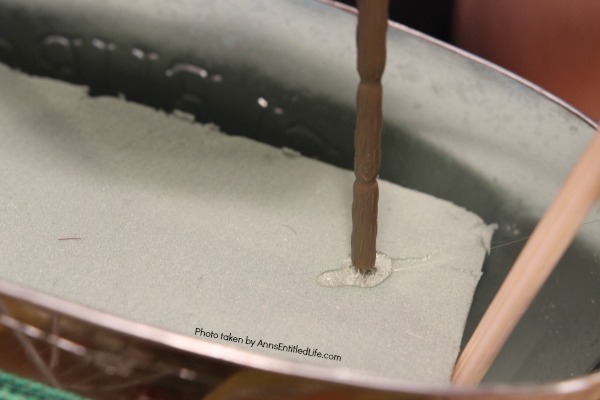
● Liberally run hot glue over your foam.
● Inset the floral foam into the tin. Hold in place until the glue cools and hardens.
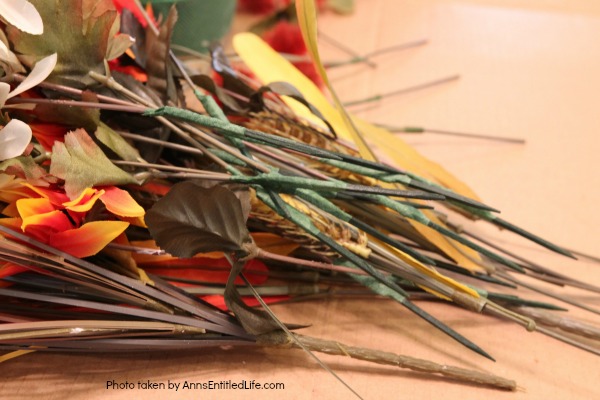
● If you purchased bushes of flowers, clip them off the bush. You want individually stemmed flowers.
● Measure the flowers against the tin and eyeball where they will hit when inserted. That is where you want to cut the stem.
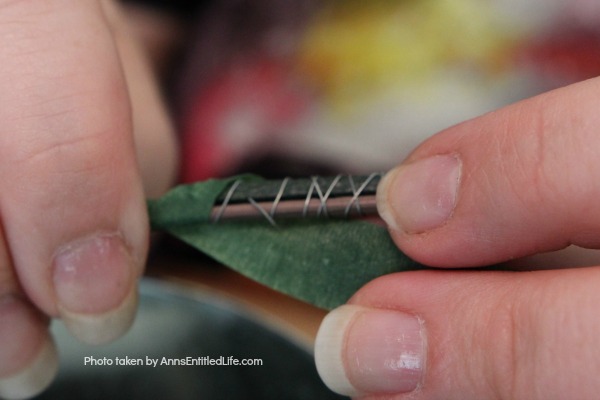
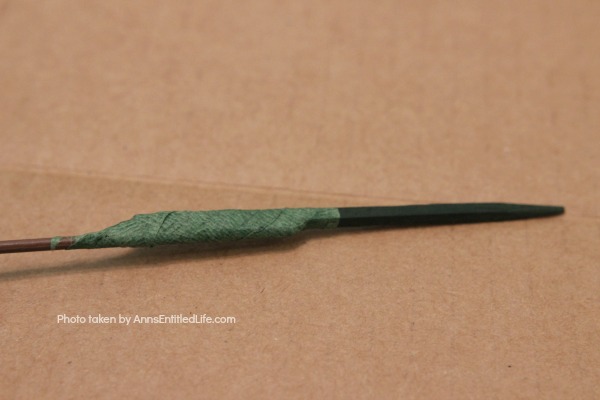
● Take a floral pick and wrap it around the floral stem.
● Take the floral wrap and cover the attached floral pick. Floral tape is wonderful in that it sticks to itself. Once you start, wrap upward (or downward) to form a mummy wrap.
● You can wrap all your flowers at once or as you need them.
● Drop a dot of hot glue onto your floral foam where you want to place your flow. Insert the picked flower on top of that hot. Hold until the glue cools and hardens.
● Taller flowers are inserted in the center, and then the other flowers are filled in around.
● Once the taller flowers (in this case, sunflowers) are inserted, begin adding the next size down flowers. Do not work on one side at a time; try and work the whole arrangement. It will help with balance. This is a three-dimensional arrangement, so be conscious of the space. Turn and work to fill in the foam in the tin.
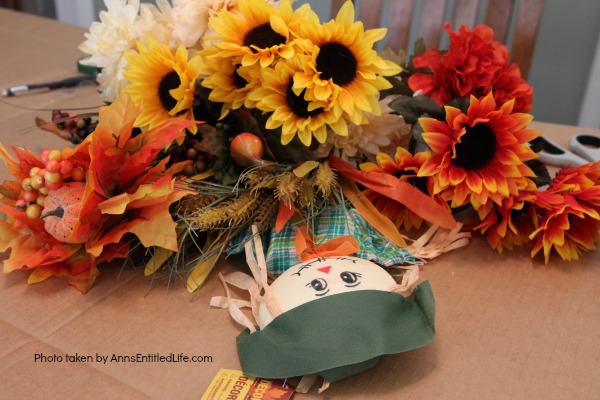
● Once the second row of flowers is inserted, insert your scarecrow.
● Insert the smaller flowers to fill in the front row.
● Check for large holes and fill in the spots with fuller flowers.
● Tall wisps are inserted last.
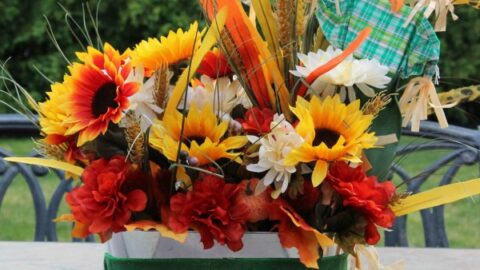
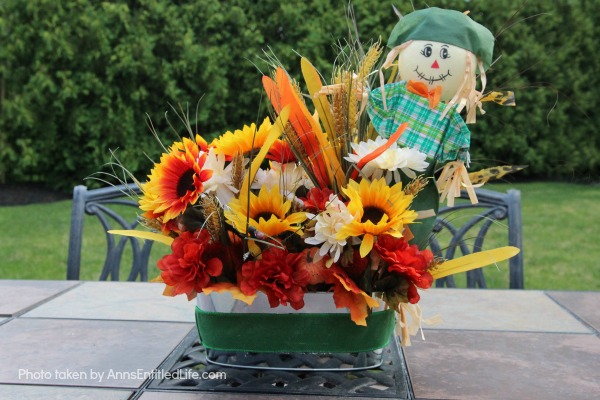
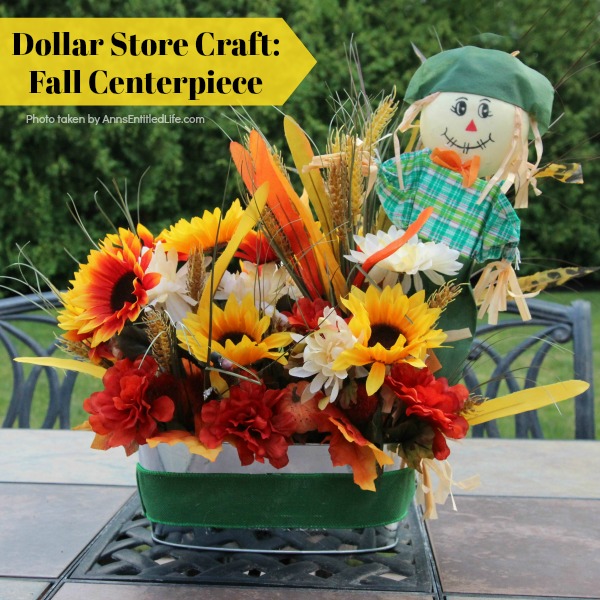
● This is what mine ended up looking like. Yours may differ depending on the container you chose, whether you want to add a bow to the side, whether you picked up different colors or flowers, etc.
Dollar Store Craft: Fall Centerpiece
Dollar Store Craft: Fall Centerpiece. This is a fun, easy-to-make fall craft you can make with basics found at your local dollar store. If you are looking for an inexpensive, yet beautiful craft, you can make this fall centerpiece in about 45 minutes with these step-by-step instructions.
Materials
- Dollar Store Flowers (color and type of your choice)
- Tin
- Floral Foam
- Small Scarecrow
- Wire Edged Ribbon
- Floral Tape
Tools
- Floral Picks
- Wire Cutters
- Hot Glue Gun
- Hot Glue Sticks
Instructions
- Wrap a piece of wire-edged ribbon around the tin (for length), plus at least ½ an inch. Cut.
- Lay the length of ribbon out good side down and fold over that excess ½”. Hot glue it in place (see above). This will help prevent fraying.
- Hot glue the ribbon to the outside of the tin.
- You may have to form darts at the ends, so the ribbon will lay flat.
- Hold the scarecrow against the tin. Eyeball how tall you would like it to be in your arrangement. The scarecrow should be the tallest thing in this craft, so plan accordingly.
- Cut the wooden stem to the length you would like your scarecrow.
- Liberally run hot glue over your foam.
- Inset the floral foam into the tin. Hold in place until the glue cools and hardens.
- If you purchased bushes of flowers, clip them off the bush. You want individually stemmed flowers.
- Measure the flowers against the tin and eyeball where they will hit when inserted. That is where you want to cut the stem.
- Take a floral pick and wrap it around the floral stem.
- Take the floral wrap and cover the attached floral pick. Floral tape is wonderful in that it sticks to itself. Once you start, wrap upward (or downward) to form a mummy wrap.
- You can wrap all your flowers at once, or as you need them.
- Drop a dot of hot glue onto your floral foam where you want to place your flow. Insert the picked flower on top of that hot. Hold until the glue cools and hardens.
- Taller flowers are inserted in the center, and then the other flowers are filled in around.
- Once the taller flowers (in this case sunflowers) are inserted, begin adding the next size down flowers. Do not work on one side at a time, try and work the whole arrangement. It will help with balance. This is a three-dimensional arrangement, so be conscious of the space. Turn and work to fill in the foam in the tin.
- Once the second row of flowers is inserted, insert your scarecrow.
- Insert the smaller flowers to fill in the front row.
- Check for large holes and fill in the spots with fuller flowers.
- Tall wisps are inserted last.
- This is what mine ended up looking like. Yours may be different depending on the container you chose, whether you want to add a bow to the side, whether you picked up different colors or flowers, etc.
Notes
Always cover your work surface against burns and scratches.
Recommended Products
As an Amazon Associate and member of other affiliate programs, I earn from qualifying purchases.
-
 JOYGOOD Artificial Flower Faux Flowers Artificial Flowers in Vase Artificial Indoor Plants Living Room Dining Table Coffee Table Decoration Flower Figurine Hotel Entrance Simulation Flower Set
 -
 Darby Creek Trading Autumn Cashmere - Vanilla Rose, Blooming Artichoke & Fall Magnolia Leaf Front Door Wreath
 -
 ZAJ Artificial Plants Fake Flowers Centerpieces - Faux Silk Flowers Bonsai in Retro Ceramic Vase, Vintage Artificial Silk Rose Flowers Bouquets Set for Home/Bedroom/Office/Wedding Decorative Swags
For more Dollar Tree store fall crafts:
● Autumn Leaf Napkin Holder: Dollar Store Craft
● Dollar Store Craft: Easy Thanksgiving Door Hanger DIY
● Dollar Store Craft: Lighted Thanksgiving Centerpiece
● For more Craft posts on Ann’s Entitled Life, click here.
● If you enjoyed this post, be sure to sign up for the Ann’s Entitled Life weekly newsletter, and never miss another article!


Roseann Hampton says
I saw my dollar store just recently put out the fall items. I’m going to have to go back and get some! Pinning!
Marie says
This looks fantastic! Don’t you just love the Dollar Store? I’m always inspired by the things that I can create using items I find there! Thanks for sharing your tutorial with us at Merry Monday this week!
Sandra L Garth says
Excellent tutorial and the finished project looks like something you’d find at the big box craft stores.
Cherryl Ehlenburg says
I love Dollar Store crafts! This really puts me in the fall decorating mood!
Tanne says
Yes, you are right. Michaels and hobby lobby flowers are so much better looking than dollar stores, but some folks like me can’t afford that.so to me dollar tree is just find and my fall center piece is lovely.
Ann says
I was surprised at the selection at the dollar store, Tanne. I’ve done several since then using dollar store flowers and they all have turned out lovely!
Ann
Teresa says
So cute, I love it!
Thank you for sharing at The Really Crafty Link Party this week. Pinned!
Allyssa says
Thank you so much for sharing this! It is really helpful and will surely use this again! Well done!